How to Create a Digital Menu with Photos for Free
A picture is worth a thousand words — and on a restaurant menu, it can be worth thousands in extra revenue. Guests who see appetizing photos of your dishes are far more likely to order confidently, try new items, and spend more. Yet most digital menus are still plain text lists. Here's how to change that, for free.

Why Photos on Your Menu Increase Sales
Research consistently shows that visual menus outperform text-only menus. When guests can see exactly what they're ordering, hesitation drops and average ticket size rises.
+30%
increase in orders for items shown with photos
70%
of diners say photos help them decide what to order
2x
more likely to try a new dish when they can see it first
How to Take Great Menu Photos with Your Phone
You don't need a professional camera or a studio setup. Modern smartphones take excellent food photos if you follow a few simple rules.
-
Use natural light
Shoot near a window during the day. Natural, diffused light makes food look fresh and appetizing. Avoid direct flash — it creates harsh shadows and washes out colors.
-
Keep the background clean
Use a plain table, a wooden board, or a simple placemat. Remove clutter so the dish is the clear focus of the image.
-
Shoot from above or at a slight angle
A top-down (flat-lay) shot works great for plates. For tall dishes like burgers or layered desserts, shoot at a 45-degree angle to show height and layers.
-
Style the plate before shooting
Wipe the rim, arrange garnishes deliberately, and add a napkin or utensil for context. Small details make a big difference.
-
Edit lightly
Boost brightness and contrast slightly. Increase saturation just a touch to make colors pop. Don't over-filter — the photo should look like the real dish.
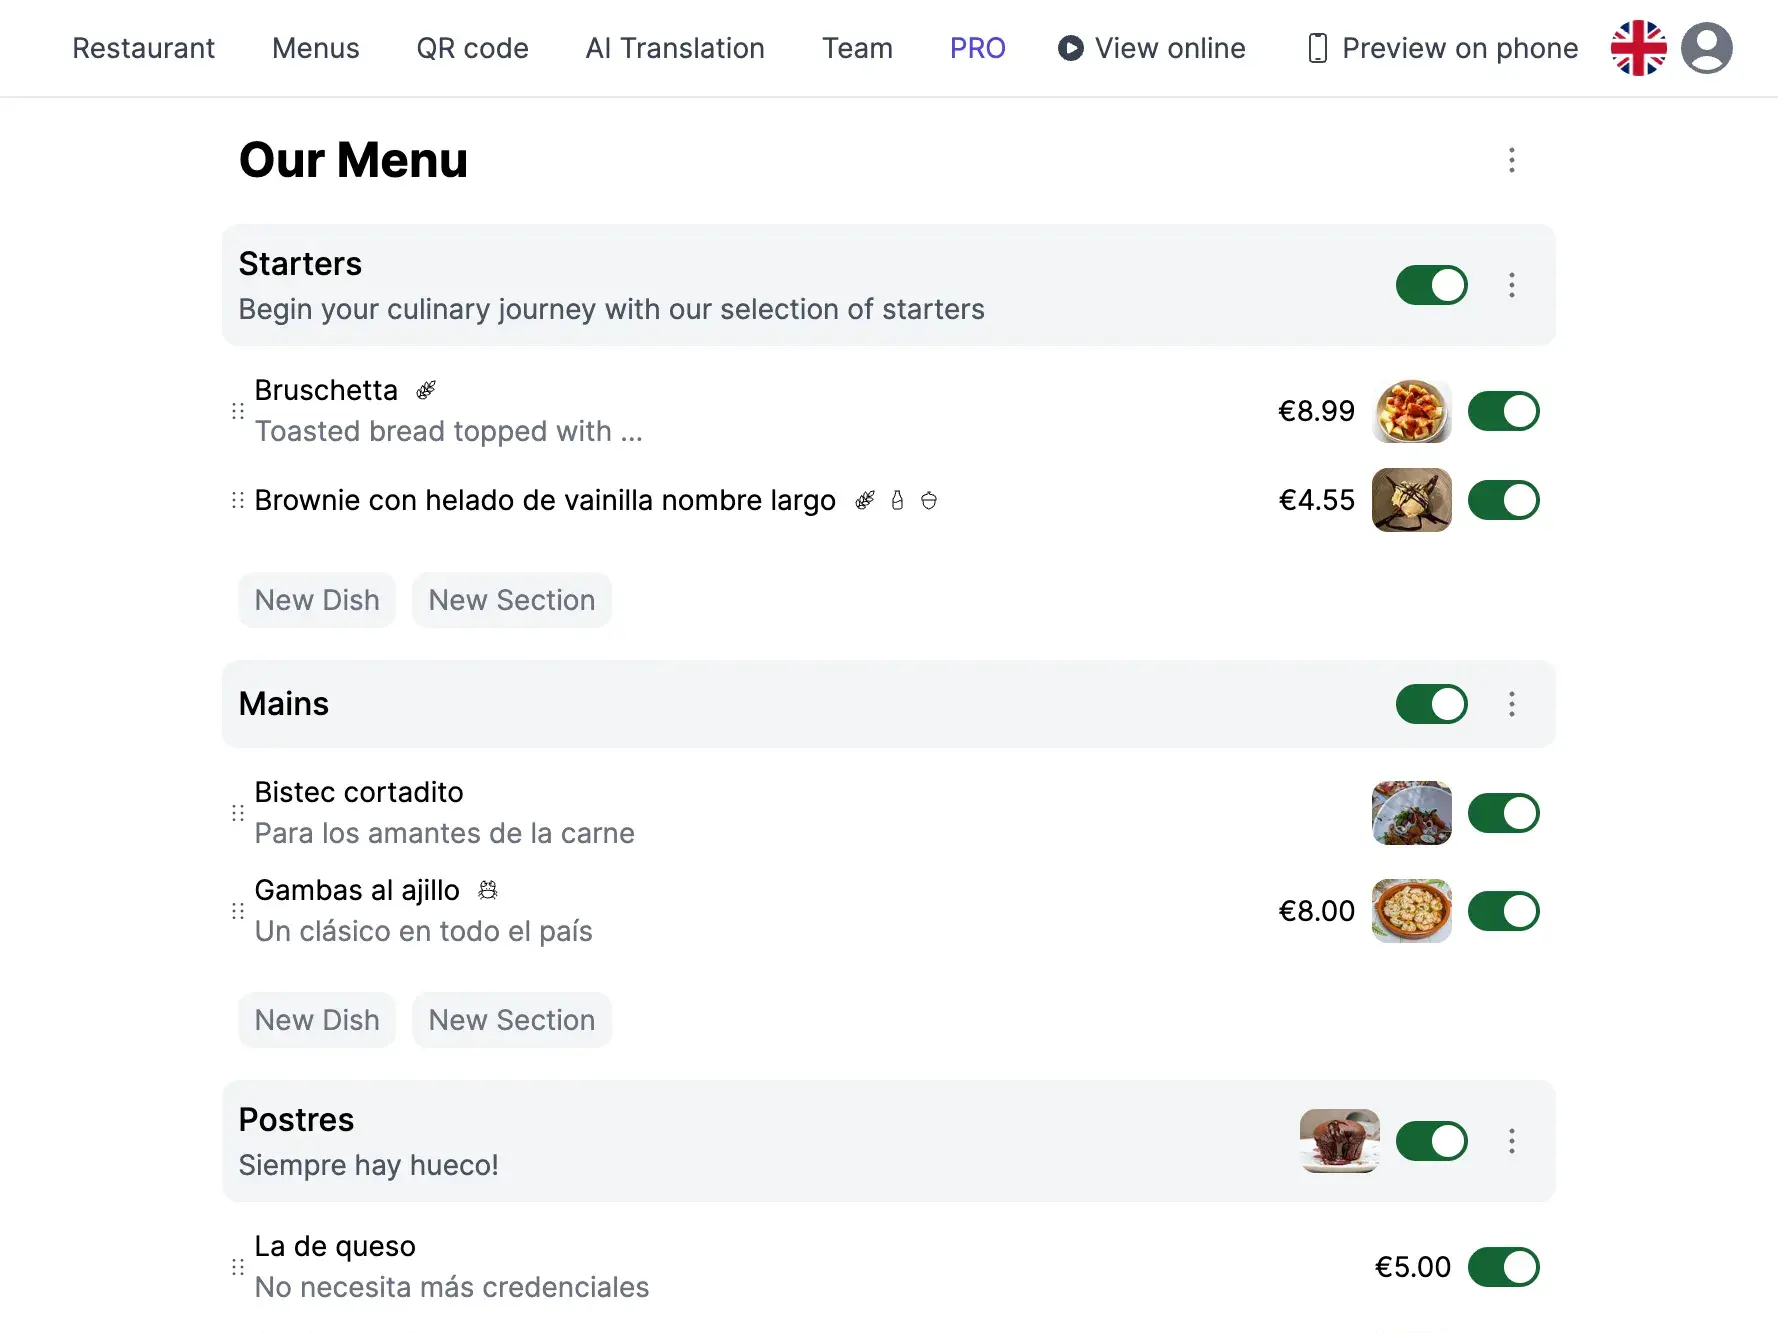
How to Add Photos to Your Digital Menu
With TopFood App, adding photos to your menu takes just a few taps. Here's the process:
-
Create your menu and dishes
Sign up for free, set up your restaurant, and add your menus, categories, and dishes with names, descriptions, and prices.
-
Upload a photo for each dish
Open any dish and tap the photo area. Choose a photo from your phone's gallery or take one on the spot. The image is automatically optimized for fast loading.
-
Preview and publish
Check how your menu looks on mobile, then share it via QR code. Guests see the photos immediately when they scan.
Menu with Photos vs Text-Only Menu
| Aspect | Menu with Photos | Text-Only Menu |
|---|---|---|
| Guest confidence | High — guests know exactly what they'll get | Lower — guests guess based on descriptions |
| Average order value | Higher — photos encourage upselling and extras | Standard — less impulse ordering |
| Time to decide | Faster — visual scanning is quicker than reading | Slower — guests read every description |
| New dish adoption | Strong — guests try items that look appealing | Weak — guests stick to familiar names |
| Tourist friendliness | Excellent — photos transcend language barriers | Poor — foreign guests struggle with text |
Best Practices for Menu Photos
- Consistency: Use the same lighting and style for all dishes so the menu looks cohesive and professional.
- Honest representation: The photo should match what the guest receives. Over-styled photos that don't match reality create disappointment and complaints.
- File size: TopFood automatically optimizes images, but start with a clear, well-lit photo for the best result.
- Update seasonally: When dishes change or improve, update the photos. A fresh photo of your new summer salad works better than last year's winter plating.
Your Menu Deserves to Be Seen
A visual menu isn't a luxury — it's a competitive advantage. Restaurants that show their food sell more of it. With a free tool like TopFood App, there's no reason to keep your menu text-only. Grab your phone, photograph your best dishes, and let your food do the talking.
Frequently Asked Questions
Do I need a professional photographer for menu photos?
No. A modern smartphone with good natural lighting produces excellent results. Follow the tips in this guide — clean background, natural light, and minimal editing — and your photos will look professional enough for a digital menu.
How many dishes should have photos?
Ideally all of them, but start with your best sellers and signature dishes. Even partial photo coverage dramatically improves the guest experience compared to a text-only menu.
Will photos slow down my menu loading time?
Not with TopFood App. All uploaded images are automatically compressed and converted to modern formats (WebP) so they load fast on any device, even on slow mobile connections.
Can I update photos after publishing my menu?
Yes. You can change any dish photo at any time from your dashboard. The update appears instantly on the live menu — no need to reprint or regenerate your QR code.